I wanted to set up better weather and systems monitoring using SignalK to capture all the NMEA2000 data and make it accessible to various devices. Since Raspberry Pis were impossible to find with the supply chain issues, I picked up an older Intel NUC from a buddy who had a couple to spare. And since all the connections I needed were in the flybridge electronics “locker” behind the upper helm, this was the natural place to install it.
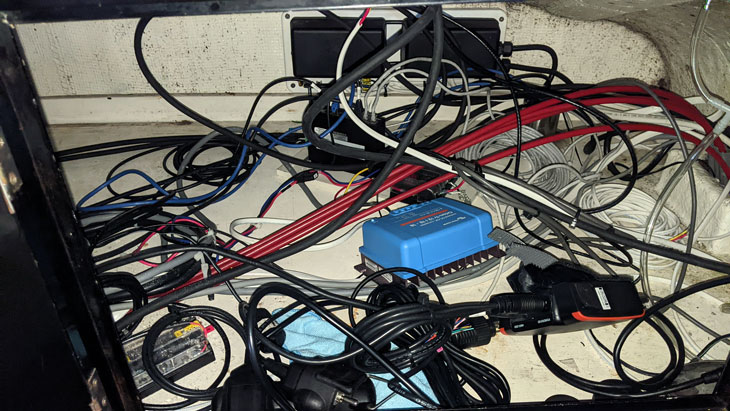
The boat came with great electronics, but the installation seemed temporary and what I think of as the “I’ll make this better later” variety. Specifically, most components were not permanently mounted and were held in place only by the rats nest of wiring.
 I told myself this would be “fun” to clean up when buying the boat.
The locker spans the full width of the flybridge and has an access door on each side. However, the starboard bench makes it impossible to crawl in through that door, so the only real access is to crawl in the port side around the chair. I definitely didn’t want to be crawling in and out a lot, so I ended up spending hours in there removing unused wires and trash, rerouting wires, and trying to figure out a plan.
 The only way in is to wriggle into the port locker door.
I determined that I could install a mounting surface on the forward wall. And I had some marine plywood and white paint that needed to be used up. The floor section includes a lip, sort of like baseboard moulding in your house, so I planned on adding some standoffs to the mounting surface.
After taking lots of photos of connections, I disconnected and removed all components so I could lay them out at home.
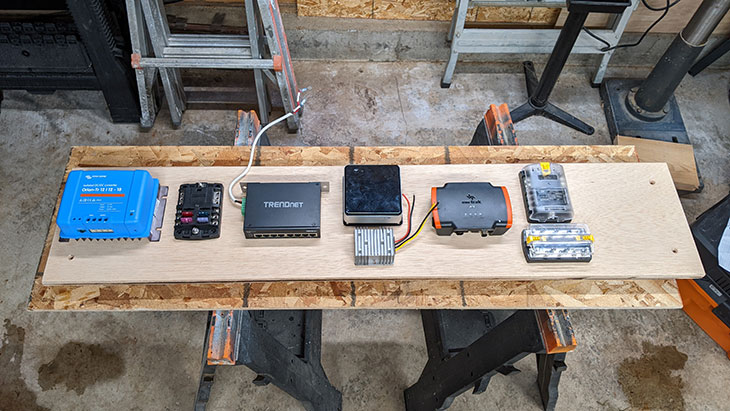 The initial rough layout of components.
There wasn’t anything complicated about building the mounting surface. I made it a little bigger than I needed to account for future additions, and added simple plywood standoffs to account for the floor lip. Finally, I rounded the corners and pre-drilled each component’s mounting location to simplify installation.
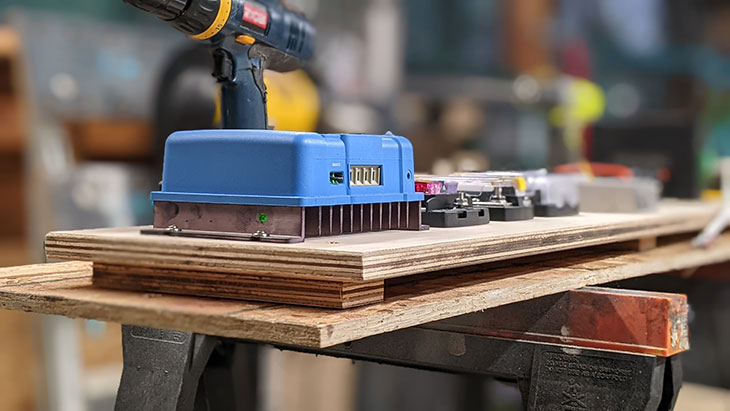 The design is very simple with plywood standoffs.
Once the paint dried, I moved the operation back to the boat, gathered everything I figured I’d need, and crawled into the locker. I first screwed the mounting surface to the forward wall and then mounted each component. I did a gut check with each wire to confirm it would reach its connection point, and ended up having to move some components around because of short wires that couldn’t be extended.
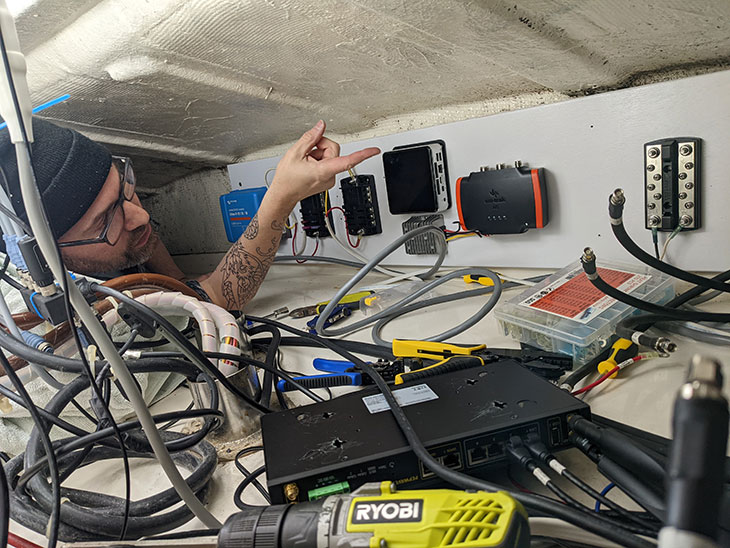 Working in this area for hours was pretty exhausting.
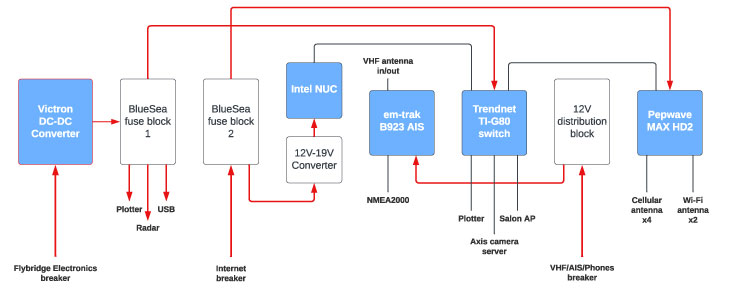
There were three breakers controlling circuits at the flybridge:
- “Flybridge Radar” which powered a Victron DC-DC converter fronting a BlueSea fuse block for the plotter, radar, network switch, and USB charging ports
- “Internet” which was directly wired to the Pepwave MAX HD2 cell modem
- “VHF Radio” which powered a distribution block connected to only the AIS; it also powered the upper and lower helm VHF radios and phones
Because I was planning to use the NUC primarily for remote monitoring, I decided to add a second BlueSea fuse block for the “Internet” circuit so the Pepwave and NUC would be switched together. I put a 12V-19V converter in front of the NUC to provide stable voltage and avoid problems with reboots due to voltage dips.
I relabeled two of the DC panel breakers to “Flybridge Electronics” and “VHF/AIS/Phones” so it was more clear what they were controlling. I suppose I should rename the third one to something like “Internet/NUC”.
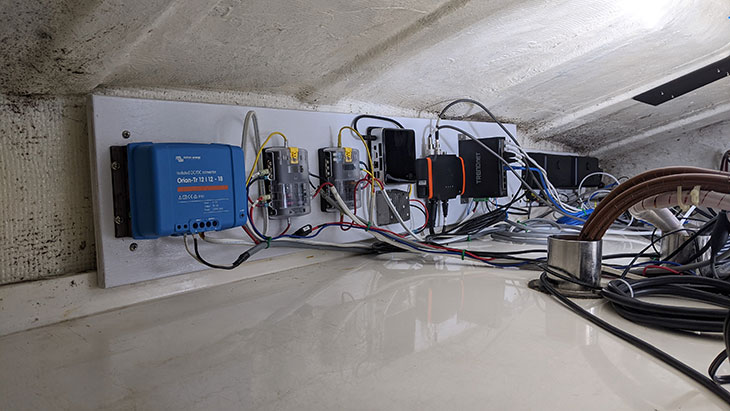
 The final electrical connections.
Once I was satisfied the layout was going to work, I reconnected all wires using new heat-shrink connectors and organized into bundles as best I could. It’s definitely not “cable porn” worthy, but it’s much cleaner than before. Not only is it easier to view and service electronics, but it freed up locker space for other things.
 While not perfect, it’s a huge improvement.
I set up the NUC to run SignalK and Grafana in Docker and used Tailscale for remote VPN access. This accomplished my goal of remote access to time-series dashboards, similar to what the previous owner had set up. I’ll share more on that in a future post.